

What This Takes Before You Start
The whole process takes between fifteen and thirty minutes once the drive is out of the machine. The only tools most people need are a Torx screwdriver (T8 or T9 for most drives), a Phillips-head screwdriver for the laptop or desktop enclosure, and a pair of pliers or a hammer for the destruction step itself. No degausser, no drill press, no specialty equipment.
Before anything else, figure out whether the drive inside the machine is a traditional magnetic hard disk drive (HDD) or a solid-state drive (SSD). The distinction matters more than any other variable in this process, because the physics of data storage differ completely between the two. If you aren’t sure, look at the label on the drive once it’s out: HDDs are heavier, usually 3.5 inches in a desktop or 2.5 inches in a laptop, and the label will reference a spin speed such as 5400 or 7200 RPM. SSDs are lighter, have no moving parts, and often look like a thin rectangular slab or an M.2 stick. “Done” means the storage medium itself is unreadable, and a dented case or a snapped circuit board alone doesn’t get you there.
Remove the Drive From the Machine First
Most guides jump straight to smashing or drilling, but the drive has to come out of the computer first, and that step trips people up more than the destruction itself. For a desktop tower, power down, unplug the machine, and open the side panel (usually two Phillips screws or a thumb latch). The hard drive sits in a metal caddy or bay, connected by a SATA data cable and a SATA power cable. Disconnect both, then unscrew or unclip the drive from the bay.
Laptops vary more. Most models made in the last decade have a removable bottom panel or a dedicated hard drive access door held by one or two small screws. Once the panel is off, the drive slides out of its connector. On ultrabooks with soldered SSDs, the storage chip is part of the motherboard and can’t be removed without desoldering, a scenario where professional processing makes more sense than a DIY approach.
One safety note: touch the metal chassis of the computer before handling the drive to discharge any static buildup. Static won’t affect your destruction plans, but it can damage other components if you intend to reuse or sell the rest of the machine.
HDD and SSD Require Different Approaches
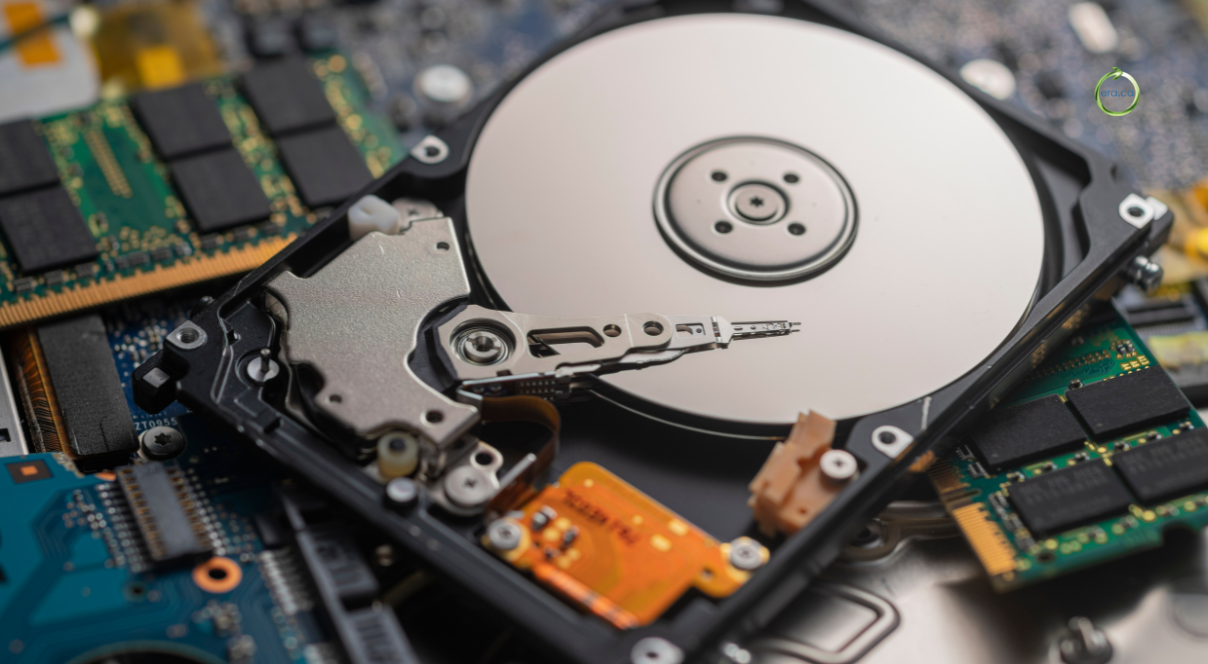
A traditional HDD stores data magnetically on spinning metal or glass platters. A read/write head floats nanometers above the surface, flipping tiny magnetic regions to encode ones and zeros. That’s why physical methods that disrupt the magnetic surface, such as scoring, bending, or degaussing, work on HDDs. The data is literally in the platter coating.
An SSD stores data as electrical charges trapped in flash memory cells on silicon chips. There are no platters, no magnetic fields, and no moving parts. A degausser does absolutely nothing to an SSD because there’s no magnetic medium to erase. Household magnets, even strong neodymium ones, won’t touch the data either. The same goes for surface scratching: there’s no surface layer to scratch in the relevant sense.
For SSDs, the reliable DIY option is to use the manufacturer’s secure-erase command (most SSD makers provide a free utility) or to physically destroy the individual NAND flash chips on the circuit board, which usually means snapping or crushing them with pliers. If the SSD is an M.2 stick, the chips are small enough that bending the stick sharply in half usually cracks them. The rest of this guide focuses on HDDs, since they’re the drives most people find when they open an older desktop or laptop and want to know how to destroy a hard drive before recycling the machine.
Physical Destruction Methods for Magnetic Hard Drives
Three approaches work without specialized equipment. They’re listed from most reliable to least, and each one assumes the drive is already removed from the computer.
Disassemble and Remove the Platters
Most HDD enclosures are held together with Torx screws, typically T8 or T9. Some drives also hide a screw under the label, so peel it back if the case won’t budge after removing all visible screws. Once the top cover is off, the platters are visible as shiny silver or glass discs stacked on a central spindle. Remove the spindle nut (usually another Torx size) and lift the platters out.
With the platters separated from the drive, the data is already far harder to recover because the alignment and mechanical context are gone, but “harder” still isn’t the same as impossible. The next step is to physically deform or destroy the platter surfaces.
Bend or Score the Platters After Removal
Metal platters can be bent with pliers or even by hand if they’re thin enough. Glass platters, common in laptop drives, will shatter when flexed, so wrap them in a cloth first. The goal is permanent deformation across the full surface, not a single crease in one spot.
If bending isn’t practical, score the platters deeply with a hardened screwdriver, a file, or coarse sandpaper pressed hard against the surface. Light scratches aren’t enough. The magnetic data layer sits beneath a protective coating, and a superficial scratch may not penetrate it. You need deep, overlapping gouges that cross the entire platter face, both sides, disrupting the magnetic layer underneath rather than just marring the finish.
Strike the Drive When Disassembly Is Not Possible
Some drives use proprietary fasteners or adhesive that makes disassembly impractical without the right bit. In that case, a hammer and a hard surface will work, but the method requires more effort than most people expect. A single strike, even a hard one, typically deforms only a small area of the platter inside, and the rest of the surface can remain intact and readable with forensic tools.
Place the drive on a concrete surface or anvil-like object, label side up, and deliver firm, overlapping strikes across the entire footprint of the drive. You’re aiming to feel the internal platters crumple and fragment, not just dent the outer casing. Flip the drive and repeat. When the case is visibly warped across its full area and you can hear loose fragments rattling inside, the platters are unlikely to retain recoverable data.
Why Drilling One Hole Is Not Enough
Drilling a single hole through a hard drive is probably the most commonly recommended DIY method online, and it’s also the one most likely to leave data exposed. A standard HDD platter stores data magnetically across its entire surface in concentric tracks. A drill bit destroys only the narrow band of tracks it passes through. Everything outside that radius, which is most of the platter, remains physically intact.
Forensic data recovery labs use magnetic force microscopy and specialized read heads to pull data from platter fragments. A single drill hole or a single hammer strike in the center of the drive leaves large intact sections that these tools can read. The false sense of security is the real danger: someone drills one hole, assumes the job is done, and hands the drive off for recycling with gigabytes of recoverable personal data still on the platter surface. If drilling is the only tool available, the minimum is multiple holes spaced across the full diameter of the platter, and even then, bending or scoring the platters after drilling is a better finish.
When Software Wiping Works and When It Leaves Data Behind
For a drive that still functions and has no bad sectors, a full-disk overwrite using a tool like DBAN (Darik’s Boot and Nuke) or the manufacturer’s secure-erase utility is a legitimate alternative to physical destruction. The software writes random data or zeros over every addressable sector, replacing the original contents. On a healthy drive, this makes the original data unrecoverable by any commercially available tool.
The catch is the word “healthy.” Drives develop bad sectors over time, and the drive’s firmware silently remaps those sectors so the operating system never sees them. A wiping utility can’t overwrite a sector the firmware has hidden, and those hidden sectors may still contain fragments of old files. For an aging drive with years of use, this is a real gap. Deleting files or emptying the recycle bin does even less: the operating system only removes the index entry pointing to the file, while the actual data stays on the platter until something else overwrites that specific location.
Software wiping makes the most sense when the drive still works and someone else can use it. A working laptop with a cleanly wiped drive is a candidate for donation through organizations that refurbish and redistribute electronics to community groups and charities. If the drive is failing, clicking, or throwing errors, physical destruction is the safer path. Knowing how to destroy a hard drive before recycling matters most in exactly that scenario, where software can’t reach every sector.
When to Hand the Drive to a Certified Processor Instead
DIY destruction is reasonable for a household cleaning out one or two old machines. It stops making sense when an office is decommissioning twenty desktops, when the drives contain regulated data such as health records or financial information, or when the drive physically can’t be opened without specialized tools. In those cases, a certified destruction vendor is the practical choice.
Look for vendors that provide a certificate of destruction listing the drive serial numbers, the destruction method used, and the date of processing. NAID AAA certification (National Association for Information Destruction) is the most widely recognized standard in North America. The certificate matters because it creates an auditable record, which is especially important for businesses subject to privacy legislation like PIPEDA in Canada.
For Canadians looking to recycle electronics responsibly after destruction, or to donate working equipment instead of destroying it, the Electronics Recycling Association offers pickup and drop-off programs across Canada. ERA focuses on giving working devices a second life through community donation rather than shredding everything, so the decision fork is genuine: if the machine still works and the drive can be securely wiped, donation through a responsible recycling program may do more good than destruction. If the drive is dead or the data is sensitive enough to require physical destruction, destroy the drive first and then route the remaining components into an e-waste stream rather than general trash.
What Happens to the Drive After Destruction
A destroyed hard drive still contains recoverable materials. The platters are typically aluminum, which is easily recycled. The rare earth magnets inside the actuator assembly (usually neodymium) are valuable and increasingly sought after for reuse. The circuit board contains small quantities of gold, copper, and palladium. Even the steel casing has scrap value.
None of these materials belong in a landfill or a household recycling bin. E-waste processors separate and recover these metals through specialized processes that municipal recycling facilities aren’t equipped to handle. In 2022, an estimated 62 million tonnes of e-waste were produced globally, and responsible routing of even small volumes matters at that scale.
Canadians can find responsible e-waste drop-off and pickup options through organizations dedicated to electronics recycling and reuse. Understanding how to destroy a hard drive before recycling is only half the job. The other half is making sure the physical remains end up somewhere they’re processed properly, not buried. If you’ve followed the steps above, the data is gone. The last step is getting the hardware to a facility that recovers what’s left, whether that’s through a local e-waste depot or a nonprofit electronics recycling program that handles both working and non-working equipment.